This Quick Start guide will lead you through the process of downloading, configuring, and running WattDepot to collect sensor data. If you are interested in modifying or extending WattDepot, check out the Developer Guide.
The core development team has developed and run WattDepot on OS X, Windows 7, and Linux, so any of those platforms should be able to run WattDepot.
WattDepot requires Java Platform Standard Edition version 1.7 or above. If do not have Java installed, you can get it from the previous link. Oracle provides both a JRE (Java Runtime Environment) and a JDK (Java Development Kit). If you only want to run WattDepot, you can download the JRE. If you plan to do development on WattDepot, download the JDK.
To check the version of Java installed on your computer type java -version from the command line. You should see something like this (but the version number will probably be higher):
$ java -version
java version "1.7.0_40"
Java(TM) SE Runtime Environment (build 1.7.0_40-b43)
Java HotSpot(TM) 64-Bit Server VM (build 24.0-b56, mixed mode)
Currently, WattDepot is using Hibernate for the persistence layer and the PostgreSQL database for storage. You can configure Hibernate to use other database backends, but we do not have experience with other backends at this time.
If you do not have PostgreSQL installed already, you will have to download and install it before running WattDepot. We recommend version 9.1 or higher. If you only plan to use PostgreSQL with WattDepot, you might find the graphical installer to be the easiest option.
If you already have PostgreSQL, one way to check the version is using the command line client tool psql:
$ psql --version
psql (9.2.4)
However, it is possible to have the psql client installed without the actual database server (such as on OS X
Mountain Lion). In that case you might see an error like the following:
$ psql
psql: could not connect to server: No such file or directory
Is the server running locally and accepting
connections on Unix domain socket "/var/pgsql_socket/.s.PGSQL.5432"?
In this case, you should download PostgreSQL to get the server as well.
Once you have PostgreSQL installed, you will need to create a user and database so that WattDepot can store things in PostgreSQL. You can do this by connecting to the database as the postgres superuser with the psql command line tool:
$ psql -U postgres

psql (9.3.4)
Type "help" for help.

postgres=# CREATE USER 'your-user-name' WITH PASSWORD 'put-your-password-here';
CREATE ROLE
postgres=# CREATE DATABASE wattdepot;
CREATE DATABASE
postgres=# GRANT ALL PRIVILEGES ON DATABASE wattdepot to 'your-user-name';
GRANT
postgres=# \q
Note that by default, PostgreSQL will only allow connections from the local host, but will allow connections to any PostgreSQL user without a password (trust authentication mode). This is probably acceptable for experimenting with WattDepot, but for a production instance you would probably want to turn on password authentication.
You can test that the new user and database has been created properly by connecting to it. Note that we do not need to specify a password since we are using trust authentication from the local system:
$ psql -U 'your-user-name'

psql (9.3.4)
Type "help" for help.

postgres=# \l
                               List of databases
   Name    |  Owner   | Encoding |   Collate   |    Ctype    |   Access privileges
-----------+----------+----------+-------------+-------------+------------------------
 postgres  | postgres | UTF8     | en_US.UTF-8 | en_US.UTF-8 |
 template0 | postgres | UTF8     | en_US.UTF-8 | en_US.UTF-8 | =c/postgres           +
           |          |          |             |             | postgres=CTc/postgres
 template1 | postgres | UTF8     | en_US.UTF-8 | en_US.UTF-8 | =c/postgres           +
           |          |          |             |             | postgres=CTc/postgres
 wattdepot | your-user| UTF8     | en_US.UTF-8 | en_US.UTF-8 |
(4 rows)
postgres=# \q
$
Download the latest release of WattDepot from the releases page. Be sure to choose one of the compressed WattDepot-<version>.tar.bz2, or WattDepot-<version>.tar.gz, or WattDepot-<version>.zip files. Uncompress the file somewhere on your hard drive. The directory structure will look like:
bin/
   client/
         wattdepot-client.properties
   server/
         wattdepot-server.properties
javadoc/
       api/         JavaDoc files
       testapi/     Test JavaDoc files
lib/
   wattdepot-<version>.jar
WattDepot stores all its files in a server home directory. By default, this will be a .wattdepot3 directory in your home directory. If you want to create the .wattdepot3 directory elsewhere, set the wattdepot.user.home Java property to the desired parent directory. The name .wattdepot3 directory name itself is not configurable.
Within the server home directory are subdirectories that store all the data for a particular server instance. The default subdirectory is server, but this can be changed on the command line with the -d argument. This allows multiple WattDepot server instances to run in parallel, each writing to a different subdirectory. Create this directory:
mkdir ~/.wattdepot3
mkdir ~/.wattdepot3/server
The server reads properties on launch from a file named wattdepot-server.properties in the server subdirectory. A default properties file can be found in the wattdepot release file you downloaded as bin/server/wattdepot-server.properties. Copy that file to your new server subdirectory (~/.wattdepot3/server if you are using the defaults), and rename it to wattdepot-server.properties.
# wattdepot-server.properties This file is part of WattDepot.
#
# Copyright (C) 2013  Cam Moore
#
# This program is free software: you can redistribute it and/or modify
# it under the terms of the GNU General Public License as published by
# the Free Software Foundation, either version 3 of the License, or
# (at your option) any later version.
#
# This program is distributed in the hope that it will be useful,
# but WITHOUT ANY WARRANTY; without even the implied warranty of
# MERCHANTABILITY or FITNESS FOR A PARTICULAR PURPOSE.  See the
# GNU General Public License for more details.
#
# You should have received a copy of the GNU General Public License
# along with this program.  If not, see <http://www.gnu.org/licenses/>.

## WattDepot server properties files. WattDepot looks for this file in
## the directory <wattdepot-server.homedir>/.wattdepot3/server/. Copy this file to that
## directory and edit the properties to match your installation.

## homedir is where the .wattdepot3 directory is. This directory holds the properties and log files.
## Defaults to current user's home directory.
#wattdepot-server.homedir=/home/user/

## Administrator account, has full access to all WattDepot data
## Change these to someting unique and secure!
wattdepot-server.admin.name=admin
wattdepot-server.admin.password=nimda

## Backend storage implementation.
#wattdepot-server.wattdepot.impl=org.wattdepot.server.depository.impl.hibernate.WattDepotPersistenceImpl

## TCP port used for incoming connections defaults to 8192
#wattdepot-server.port=8192

## TCP port used for testing defaults to 8194
#wattdepot-server.test.port=8194

## Database connection driver. Default to org.postgresql.Driver
wattdepot-server.db.connection.driver=org.postgresql.Driver

## WattDepot database uri. format postgres://<db.username>:<db.password>@<database-host>:<database-port>/<database-name>
wattdepot-server.database.url=postgres://dbuser:secret@localhost:5432/wattdepot


## show the sql statements
#wattdepot-server.db.show.sql=false

## Automatically validates or exports schema DDL to the database when
## the SessionFactory is created. With create-drop, the database schema
## will be dropped when the SessionFactory is closed explicitly.
## Valid values are validate | update | create | create-drop
## defaults to update.
#wattdepot-server.db.update=update

## Enable logging. Defaults to true.
#wattdepot-server.enable.logging=true

## Set the logging level. Defaults to INFO.
#wattdepot-server.logging.level=INFO
After the file is copied into place, open it in your favorite text editor and change or uncomment any lines you want. At a minimum, you must change:
wattdepot-server.admin.name, you can change this value in the wattdepot-server.properties file or create the environment variable WATTDEPOT_ADMIN_NAME.wattdepot-server.admin.password, you can change this value in the wattdepot-server.properties file or create the environment variable WATTDEPOT_ADMIN_PASSWORD.wattdepot-server.database.url, you must change this url to use the psql user and password you created in PostgreSQL. Replace <myuser> with the user name and <secret> with the user's password. You can create the environment variable WATTDEPOT_DATABASE_URL.The environment variables will override the values in the wattdepot-server.properties file.
If these three values are not defined WattDepot will not run.
Change to the top level of the wattdepot distribution you downloaded and uncompressed. Run the server:
$ java -cp lib/wattdepot-<version>.jar org.wattdepot.server.WattDepotServerYou should see something like the following with your values.
Starting WattDepot server.
Host: http://localhost:8192/wattdepot/
Server Properties:
                wattdepot-server.admin.name = admin
                wattdepot-server.admin.password = ((hidden))
                wattdepot-server.check.sessions = false
                wattdepot-server.context.root = wattdepot
                wattdepot-server.database.url = ((hidden))
                wattdepot-server.db.connection.driver = org.postgresql.Driver
                wattdepot-server.db.connection.url = jdbc:postgresql://localhost:5432/wattdepot
                wattdepot-server.db.password = ((hidden))
                wattdepot-server.db.show.sql = false
                wattdepot-server.db.update = update
                wattdepot-server.db.username = dbuser
                wattdepot-server.enable.logging = true
                wattdepot-server.enable.timing = false
                wattdepot-server.heroku = false
                wattdepot-server.homedir = /Users/carletonmoore/.wattdepot3/server
                wattdepot-server.hostname = localhost
                wattdepot-server.logging.level = INFO
                wattdepot-server.port = 8192
                wattdepot-server.test.heroku = false
                wattdepot-server.test.port = 8194
                wattdepot-server.test.wattdepot.impl = org.wattdepot.server.depository.impl.hibernate.WattDepotPersistenceImpl
                wattdepot-server.wattdepot.impl = org.wattdepot.server.depository.impl.hibernate.WattDepotPersistenceImpl

Starting the Apache HTTP client
2015-03-30 13:37:42.753:INFO:oejs.Server:jetty-7.x.y-SNAPSHOT
2015-03-30 13:37:42.777:INFO:oejs.AbstractConnector:Started SelectChannelConnector@0.0.0.0:8192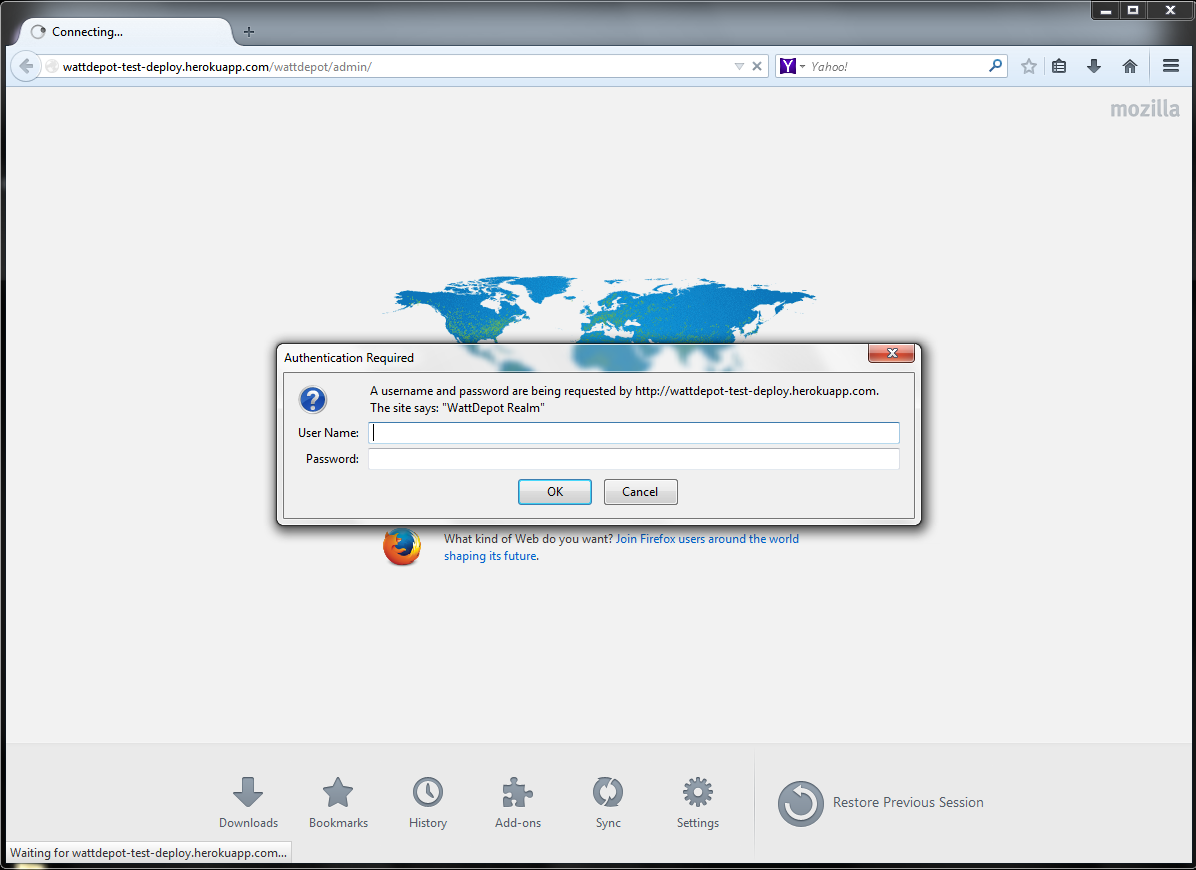
WattDepot server now running.Once the WattDepot Server is running, point your browser to the Wattdepot administration page.
http://<WattDepot_server_url>/wattdepot/admin/
The browser will ask you for a username and password. Use the Administrator's username and password.
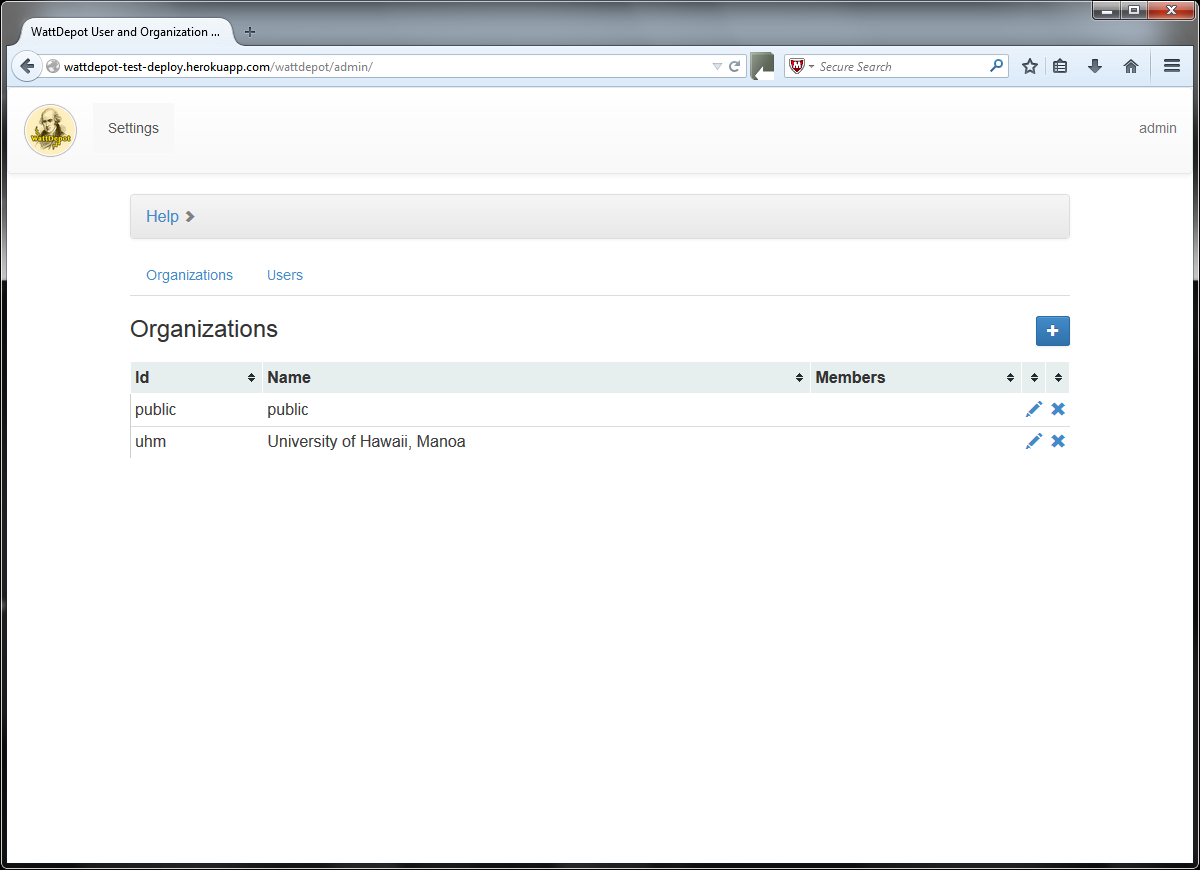
Log in as the administrator and you will see the following "admin interface". Here you can create the organizations and users.
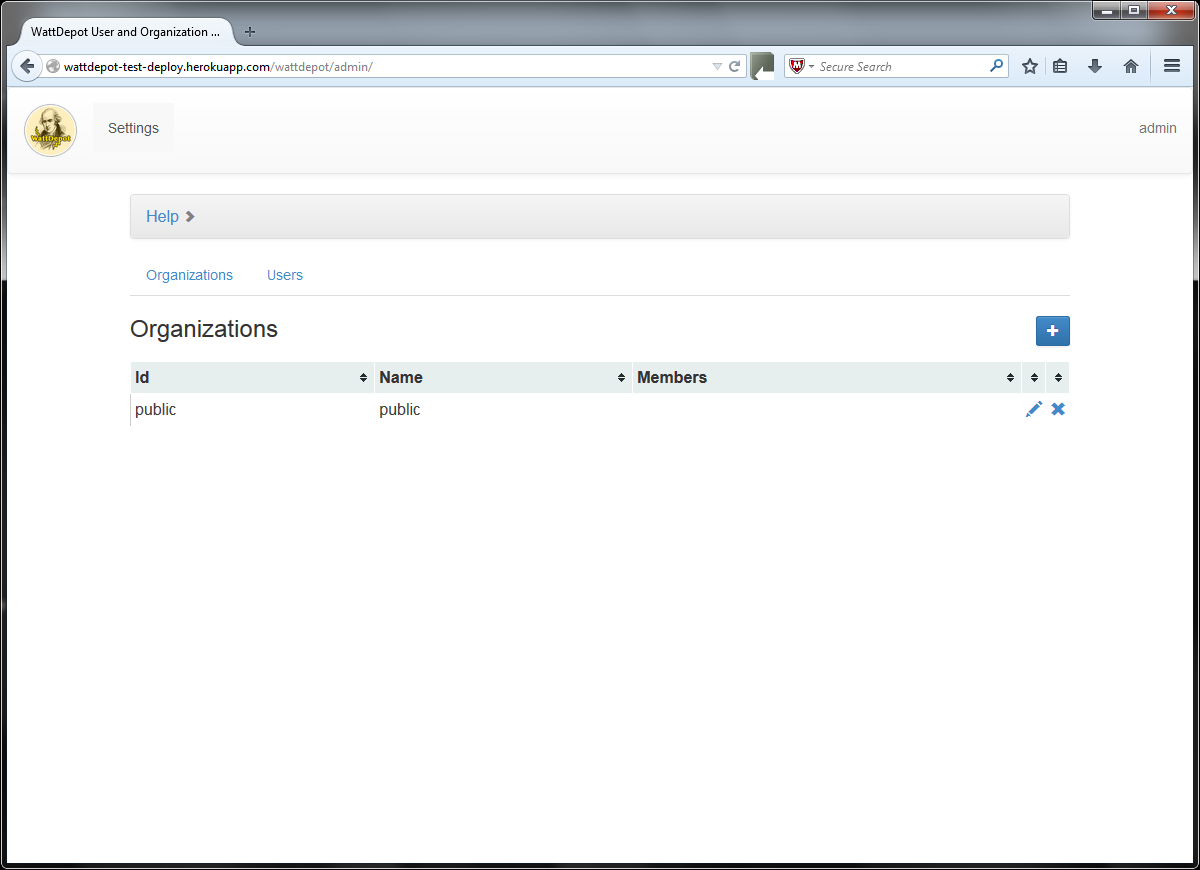
To create a new organization click the plus button on the right side of the screen. You will see the Add Organization dialog box.
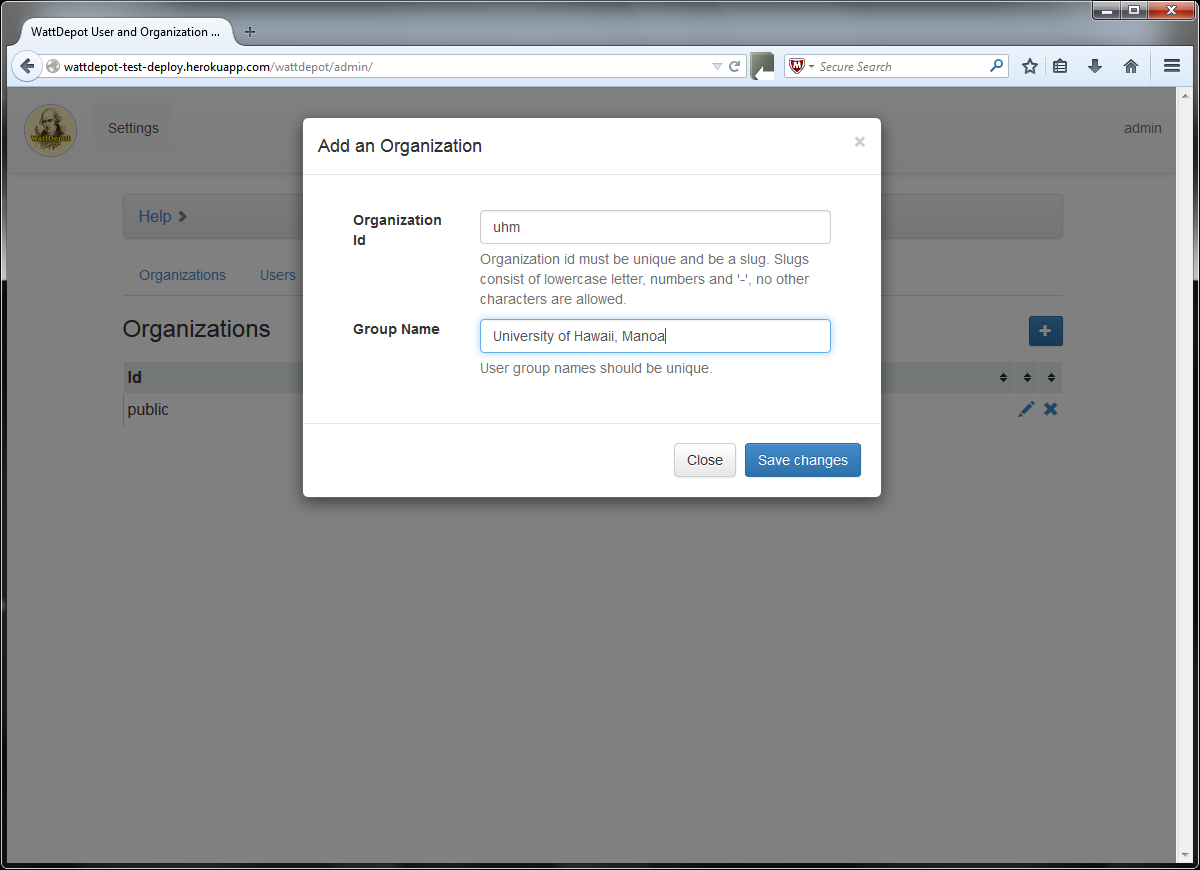
Clicking on "Save Changes" will create the organization.
Switch over to the Users tab to start defining users.
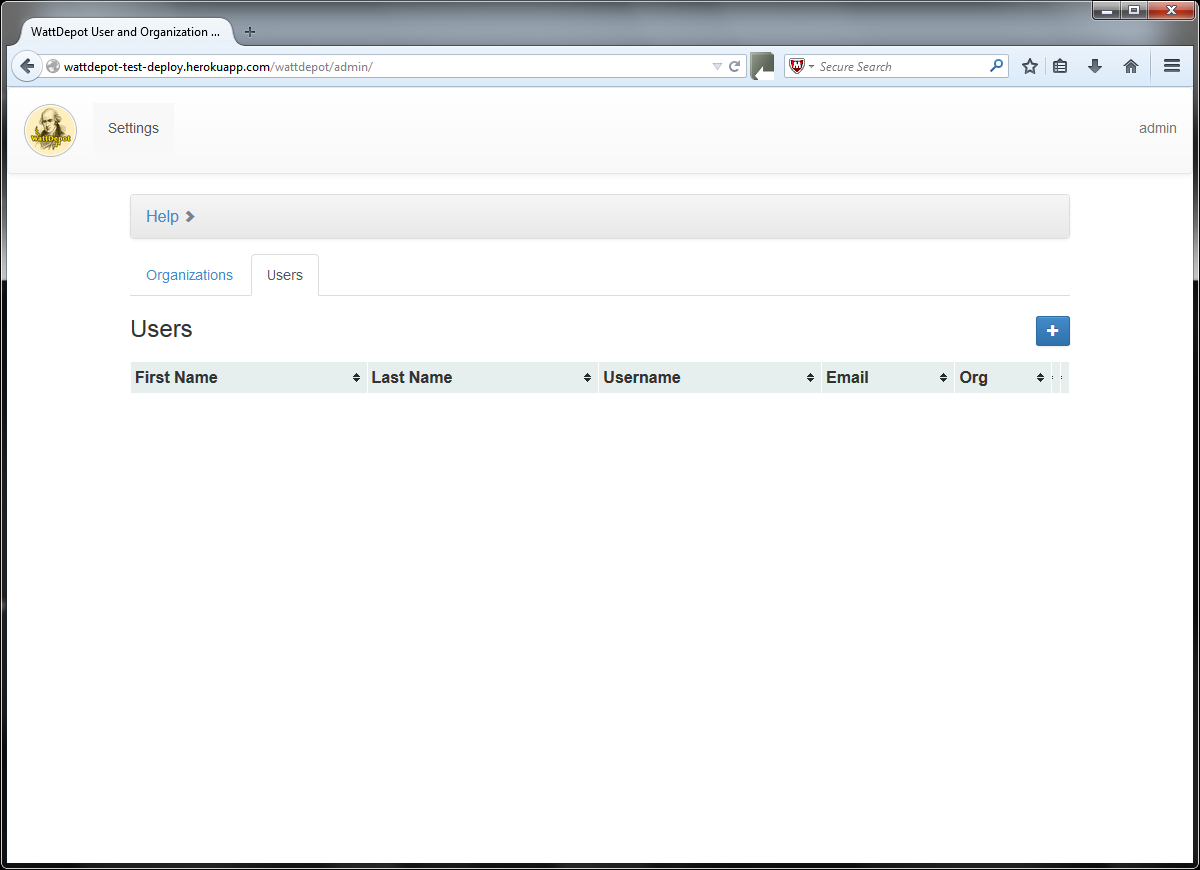
To create a new user click the plus button on the right side of the screen. You will see the Add User dialog box.
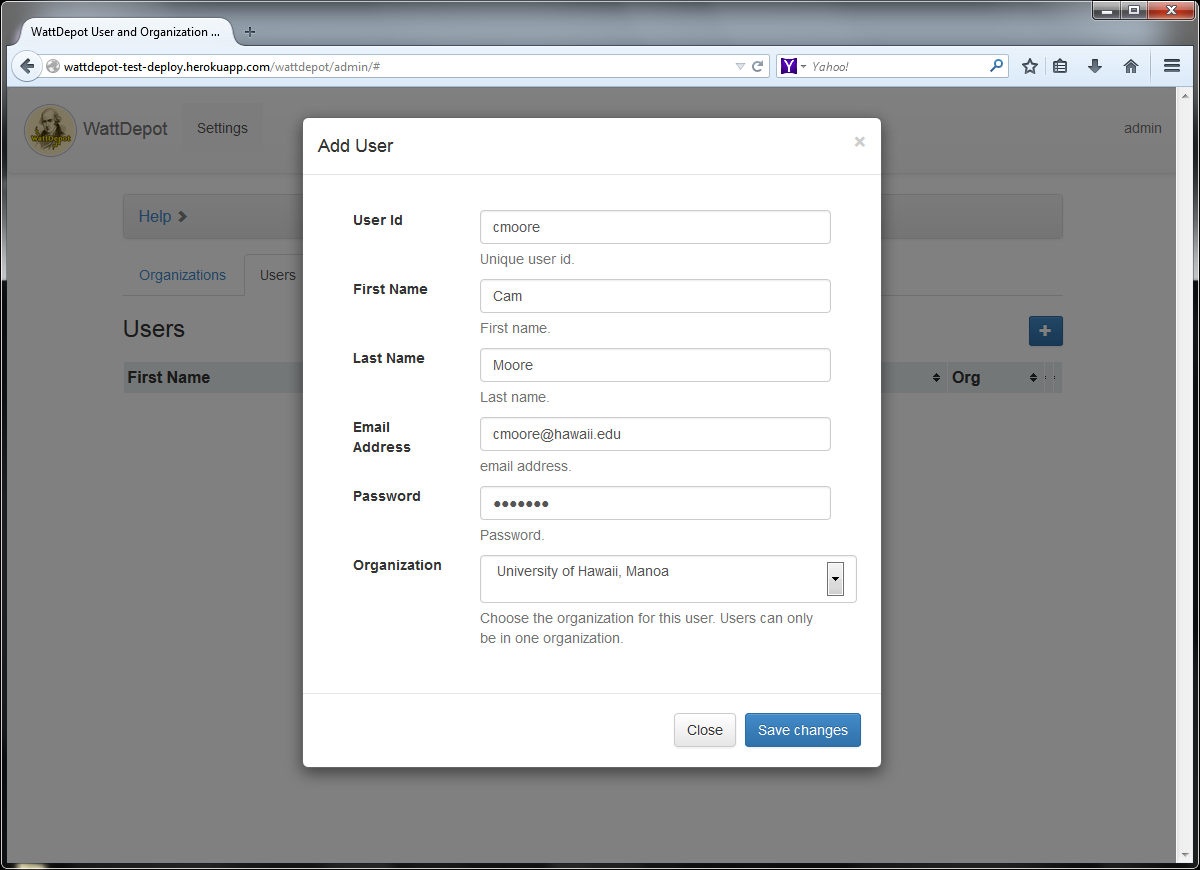
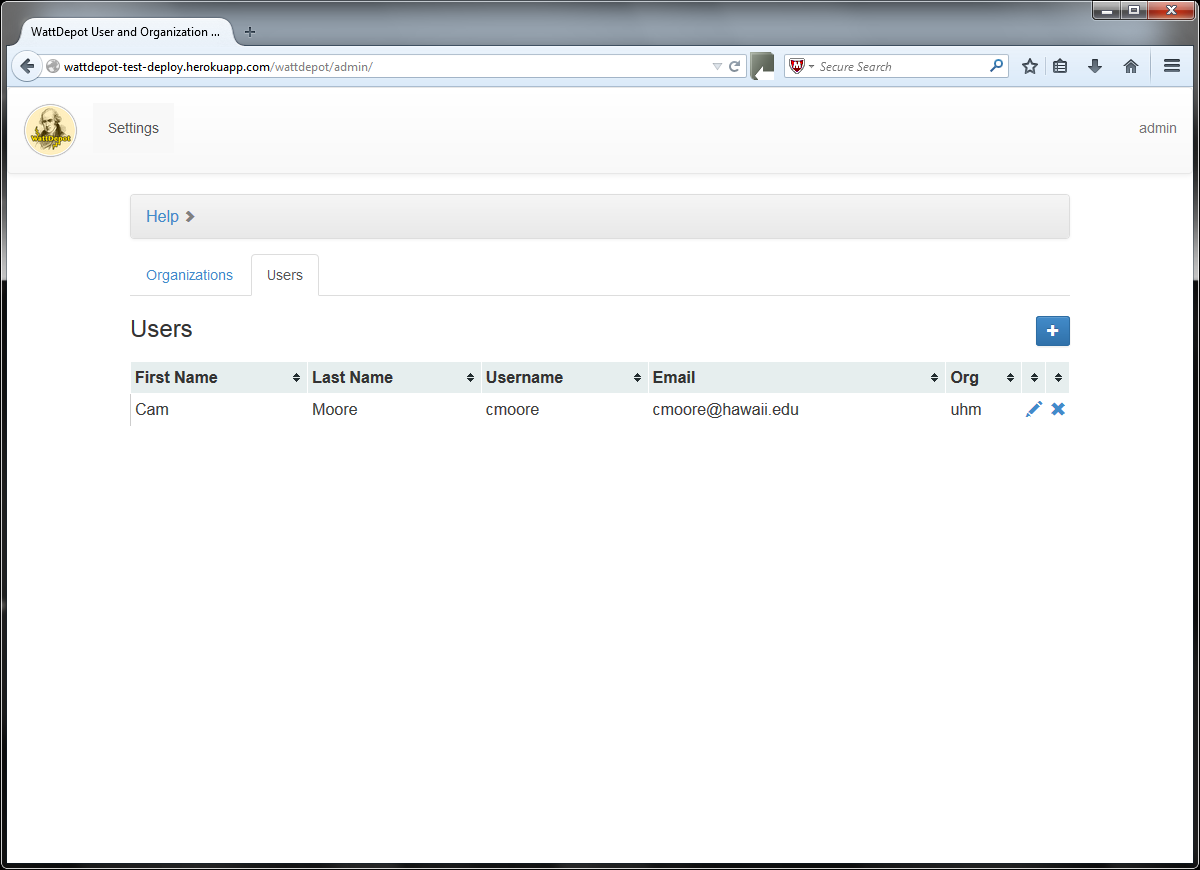
Fill out the information. Only the administrator can change the users' passwords. The administrator will have to tell the users their passwords. Remember to select the organization for your new user and hit "Save Changes".
Close your browser to log out from WattDepot.
Restart your browser and go to your organizations administration page.
http://<WattDepot_server_url>/wattdepot/<organization_id>/
In our example the University of Hawaii, Manoa organization's administration page is:
http://wattdepot-test-deploy.herokuapp.com/wattdepot/uhm/
The browser will ask you for your username and password. Use the user's id and password you just created.
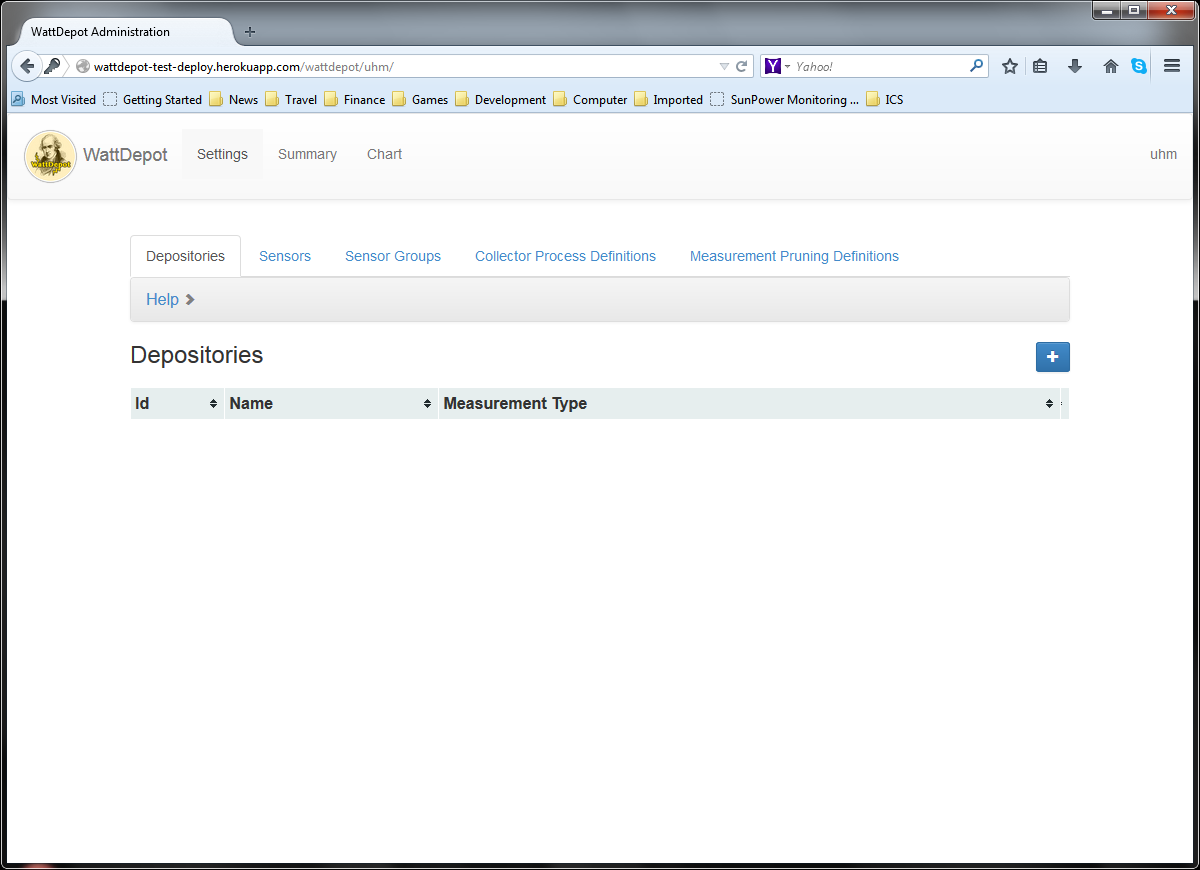
The organization id is in the upper right-hand corner. You have tabs for defining Depositories, Sensors, SensorGroups, Collection Process Definitions, and Measurement Pruning Definitions.
Even though WattDepot is focused on energy and power, we are going to show you how to create a temperature depository, National Oceanic and Atmospheric Administration web sensor, and a Collector Process Definition to gather temperature data. The reason for this is you can follow the steps for your own installation and start collecting data without having your own smart meters installed.
Depositories hold measurements of a given Measurement Type. To create a depository click the blue plus symbol.

We gave the depository a descriptive id and name and selected the Measurement Type "Temperature (F)" for this depository. Once you hit "Save Changes" you will see the defined depository.
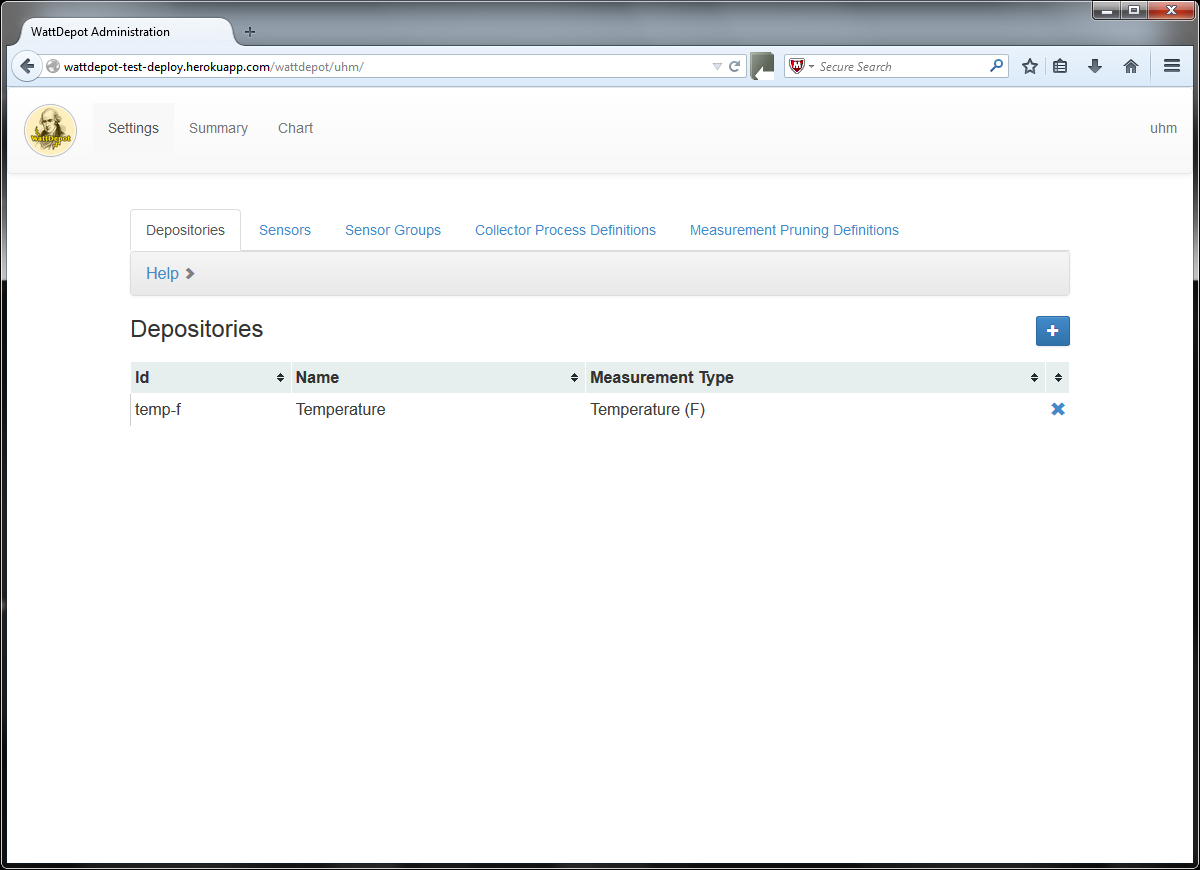
Switch to the "Sensors" tab to define our NOAA Weather Sensor.

Press the blue plus sign to bring up the Add Sensor Dialog Box.
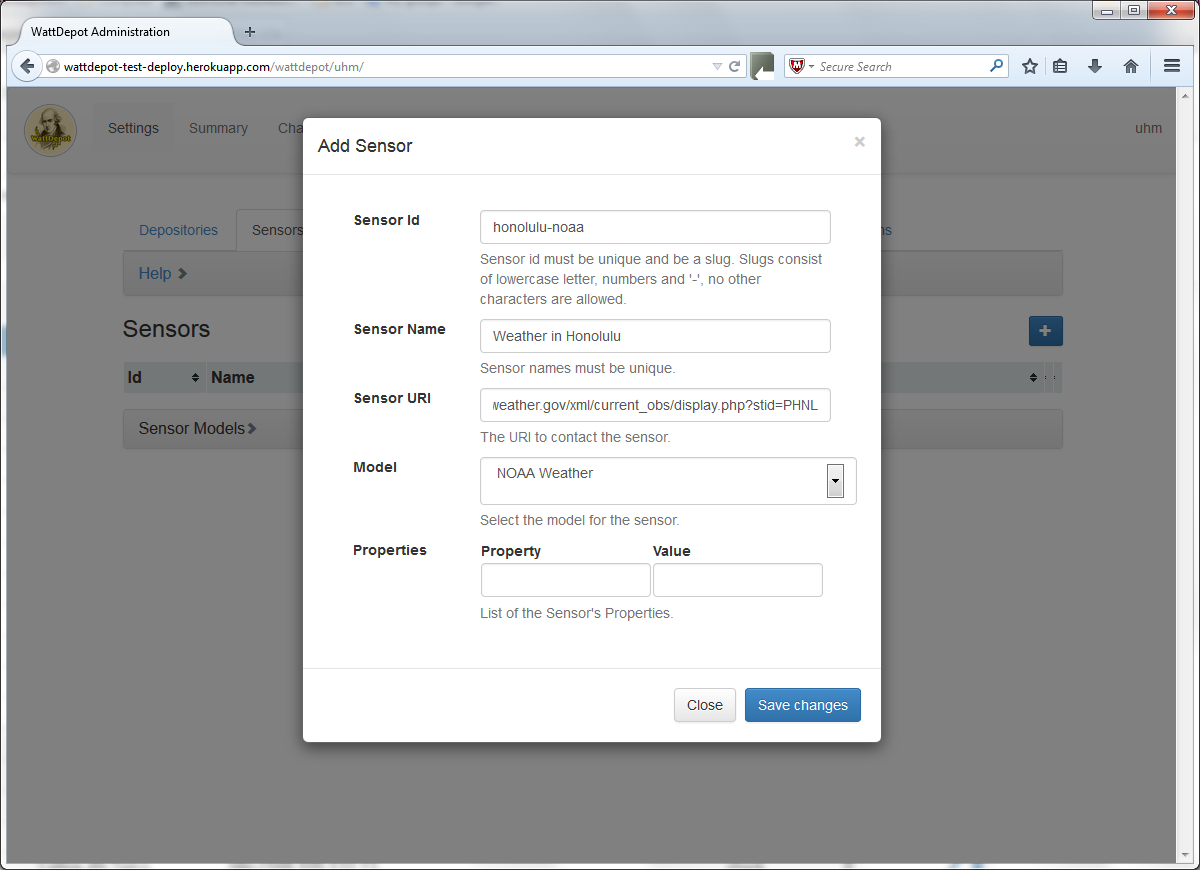
The url for the sensor is the current observation XML page for the Honolulu Airport. If you go to w1.weather .gov/xml/current_obs/ you can select the state and weather station you are interested in. We choose the NOAA Weather sensor model. For this sensor we do not need to supply any properties.
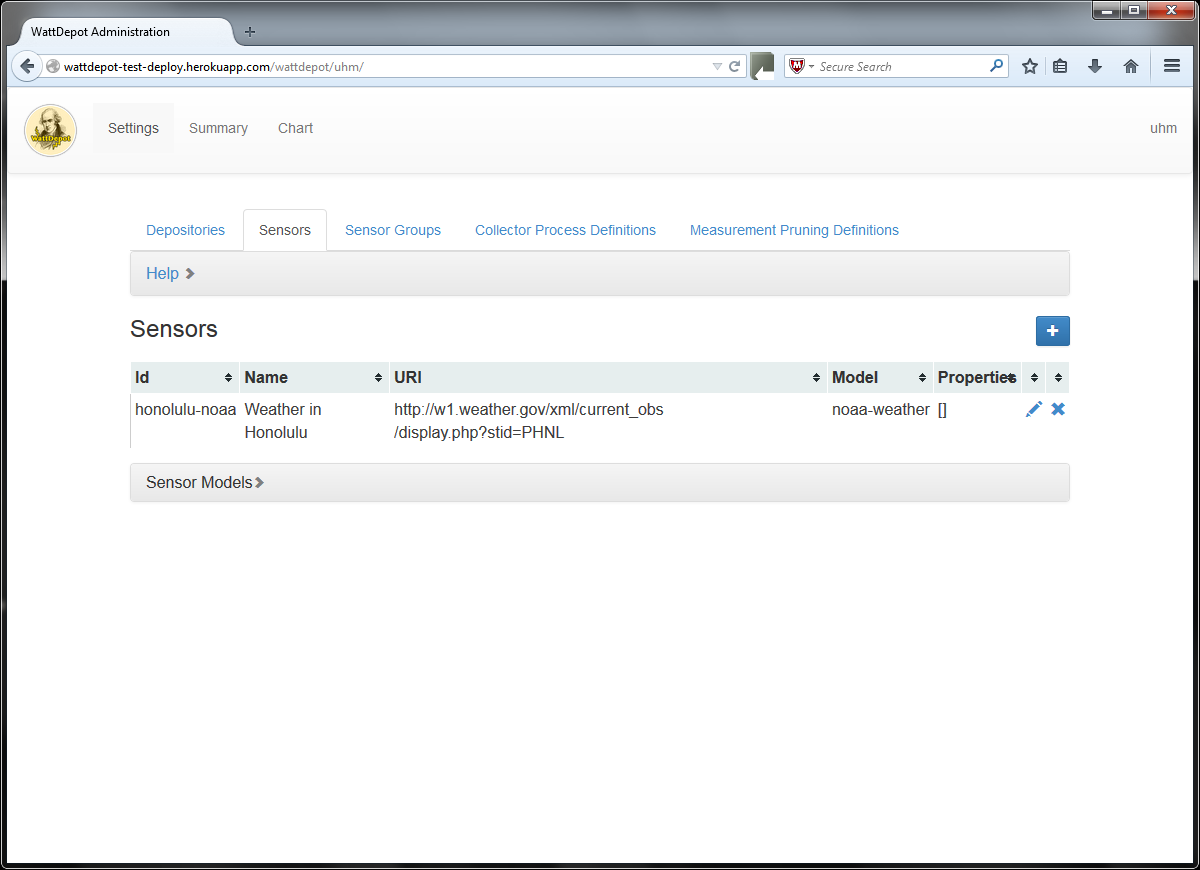
In this guide we will not be creating any Sensor Groups. Sensor Groups are used to aggregate measurements together.
We need to create a Collector Process Definition to tell our collectors:
Switch to the Collector Process Definitions tab.
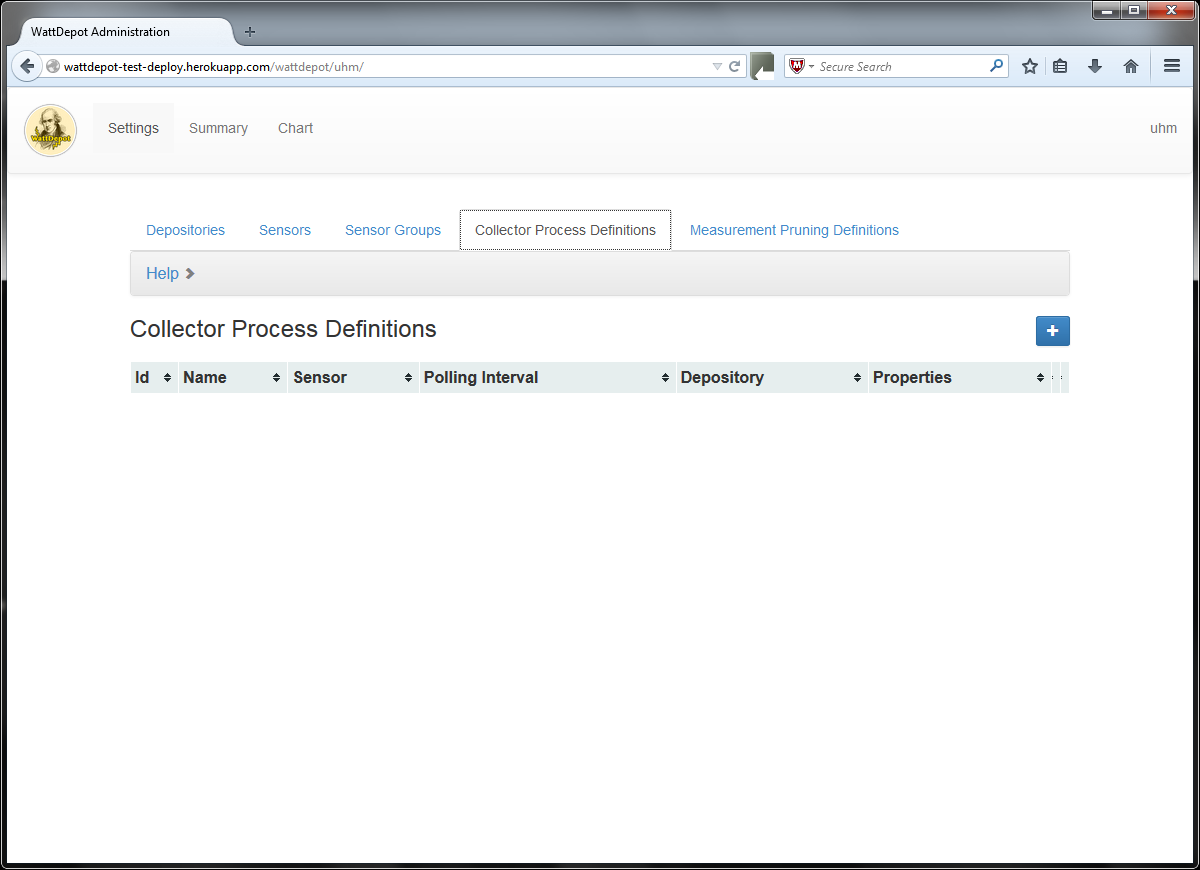
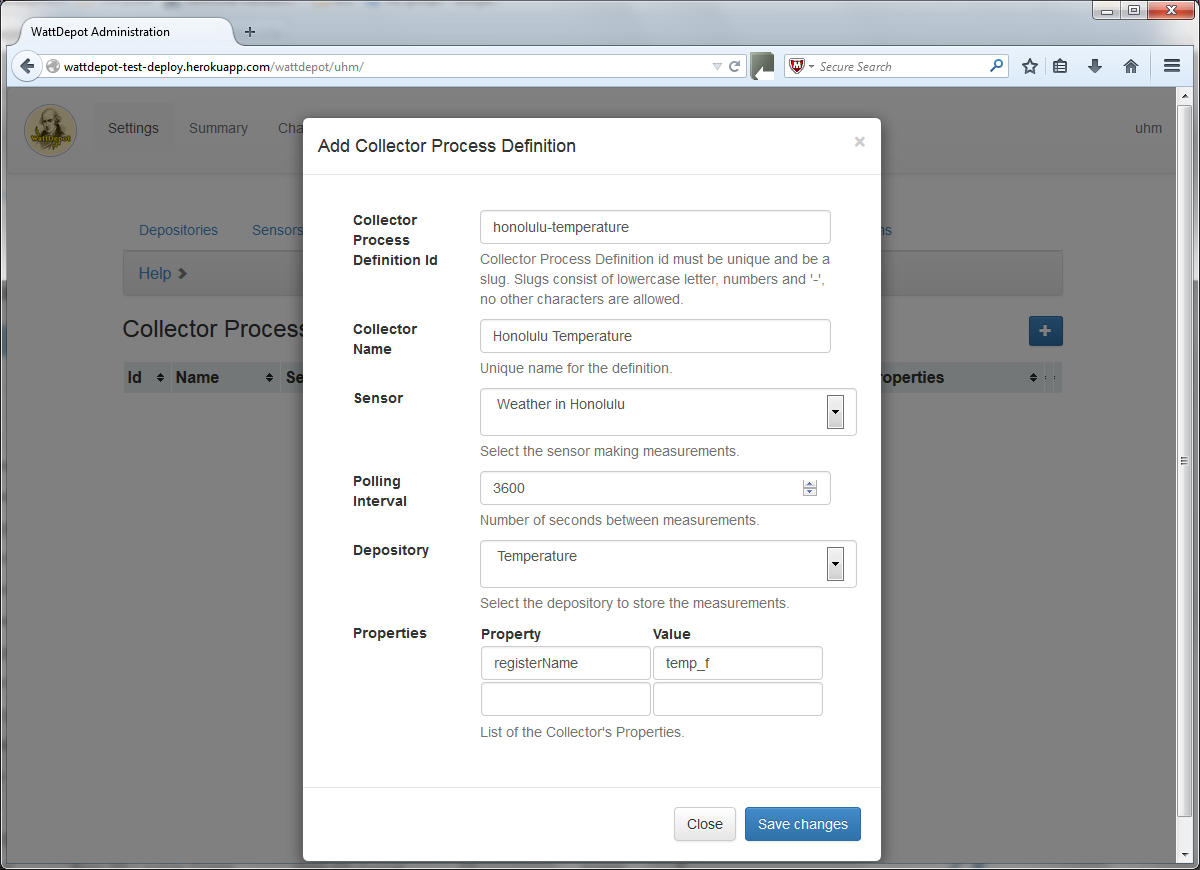
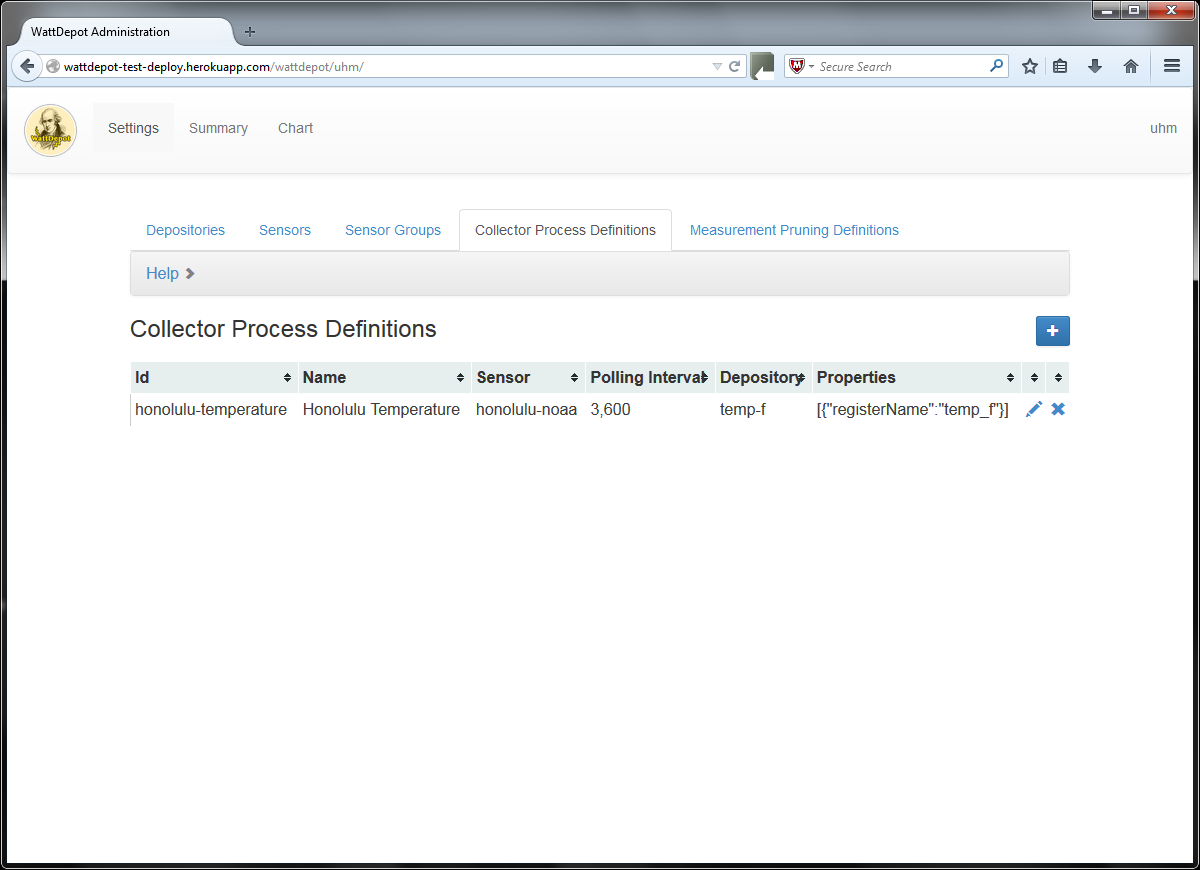
And press the blue plus sign to open the Add Collector Process Definition dialog.
We now need to start the collector process. WattDepot comes with a Java program that will query a WattDepot server and start all the Collectors for a given Organization.
Open a command prompt and change directory to where you have the WattDepot jar file. Run the following command to see the command line options for the AllOrganizationCollectors program.
10:59 [~/wattdepot] $ java -cp wattdepot-3.0.0-RC2.jar org.wattdepot.client.http.api.collector.AllOrganizationCollectors -h
usage: AllOrganizationCollectors
 -d,--debug                  Displays debugging information.
 -h                          Usage: AllOrganizationCollectors -s <server uri> -u
                             <username> -p <password> -o <orgId> [-d]
 -o,--organizationId <arg>   User's Organization id.
 -p,--password <arg>         Password
 -s,--server <arg>           WattDepot Server URI.
                             (http://server.wattdepot.org)
 -u,--username <arg>         Username
11:00 [~/wattdepot] $
To start the collector processes we need to supply:
The following is an example of starting the processes.
11:08 [~/wattdepot] $ java -cp wattdepot-3.0.0-RC2.jar org.wattdepot.client.http.api.collector.AllOrganizationCollectors -s http://wattdepot-test-deploy.herokuapp.com/ -u cmoore -p ****** -o uhm -d
All Organization Collectors:
    WattDepotServer: http://wattdepot-test-deploy.herokuapp.com/
    Username: cmoore
    OrganizationId: uhm
    Password: ********
Aug 14, 2014 11:08:19 AM org.wattdepot.client.ClientProperties initializeProperties
INFO: Loading Client properties from: /Users/carletonmoore/.wattdepot3/client/wattdepot-client.properties
Starting the Apache HTTP client
Stopping the HTTP client
Starting the Apache HTTP client
Stopping the HTTP client
Starting honolulu-temperature
Loading Client properties from: /Users/carletonmoore/.wattdepot3/client/wattdepot-client.properties
Starting the Apache HTTP client
Stopping the HTTP client
Starting the Apache HTTP client
Stopping the HTTP client
Starting the Apache HTTP client
Stopping the HTTP client
Starting the Apache HTTP client
Stopping the HTTP client
Starting the Apache HTTP client
Stopping the HTTP client
Starting the Apache HTTP client
Stopping the HTTP client
Started polling Weather in Honolulu sensor at 2014-08-14T11:08:25.425-10:00
Starting the Apache HTTP client
Stopping the HTTP client
Measurement [id= honolulu-noaa1408050505868°f, sensorId=honolulu-noaa, timestamp=2014-08-14T11:08:25.868-10:00, value=87.0, units=°F]
[clip]
As long as you are running this Java program it will collect measurements from all the organization's defined collector process definitions and send those measurements to the WattDepot Server.
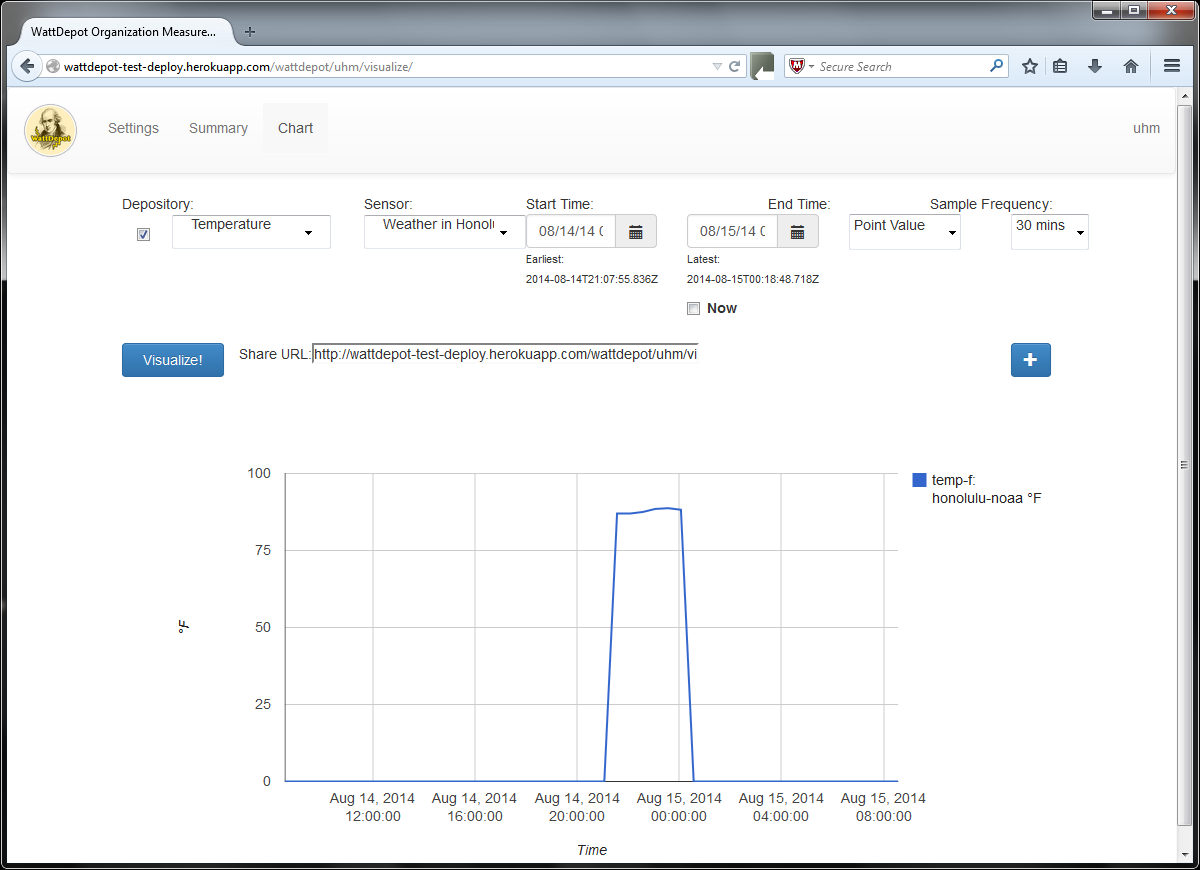
There are two ways to see if WattDepot is collecting measurements.
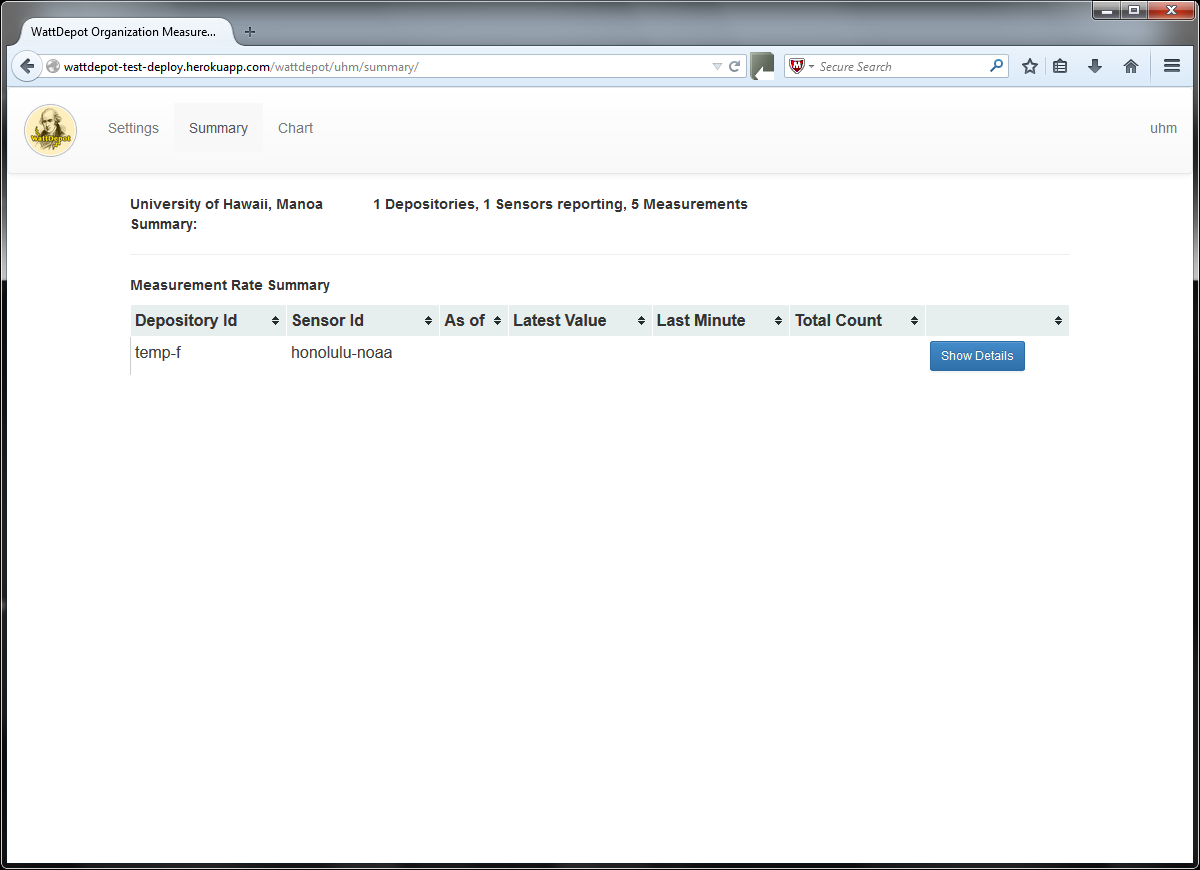
Pressing the "Show Details" button will update the current statistics for the Depository-Sensor pair.
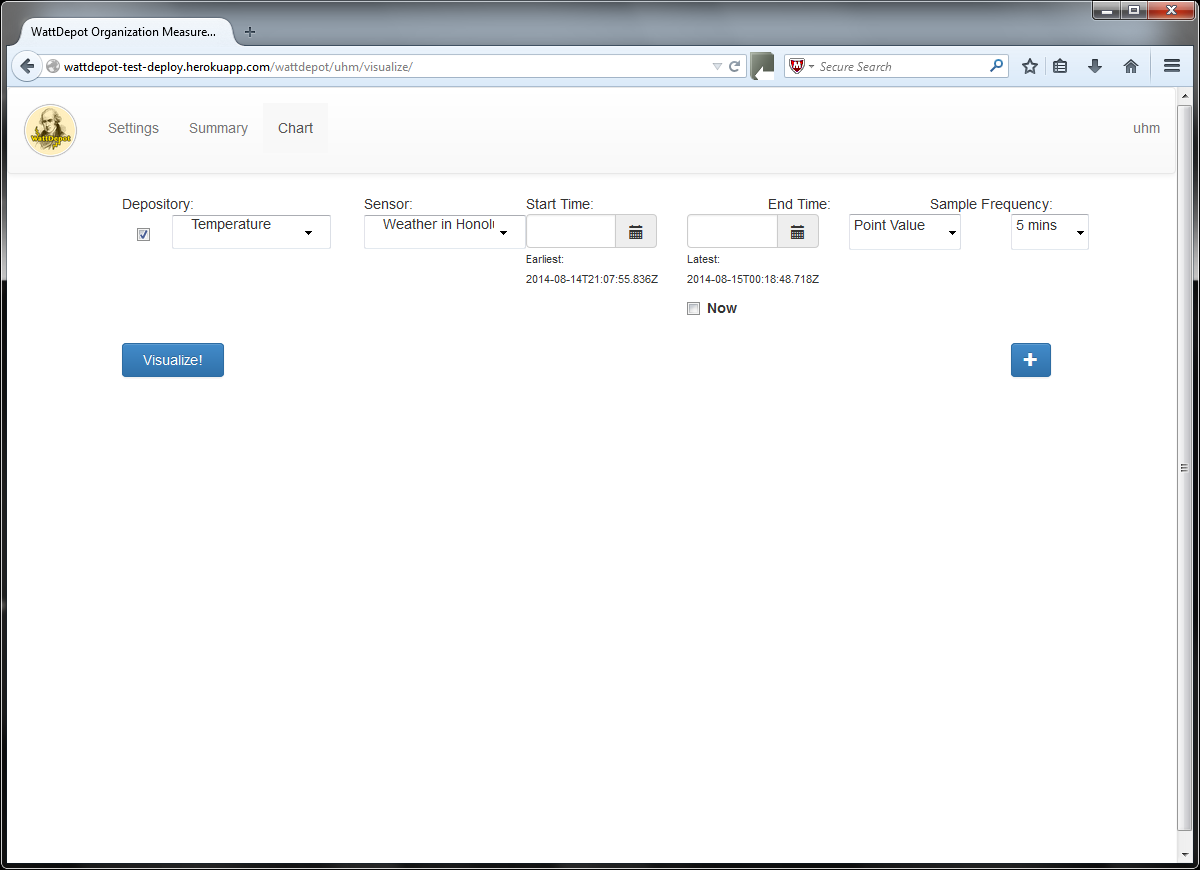
Choose the type if interpreted value you want to view.
Choose the sample frequency. The sample frequency determines the number of samples to take. Be careful, large time windows with small sample frequency can lead to very many samples and very slow performance.
Press the Visualize button to see the graph. If you want to graph more than one set of measurements press the blue plus sign. This will give you another row to select the measurements, time range, type of value, and sample frequency.